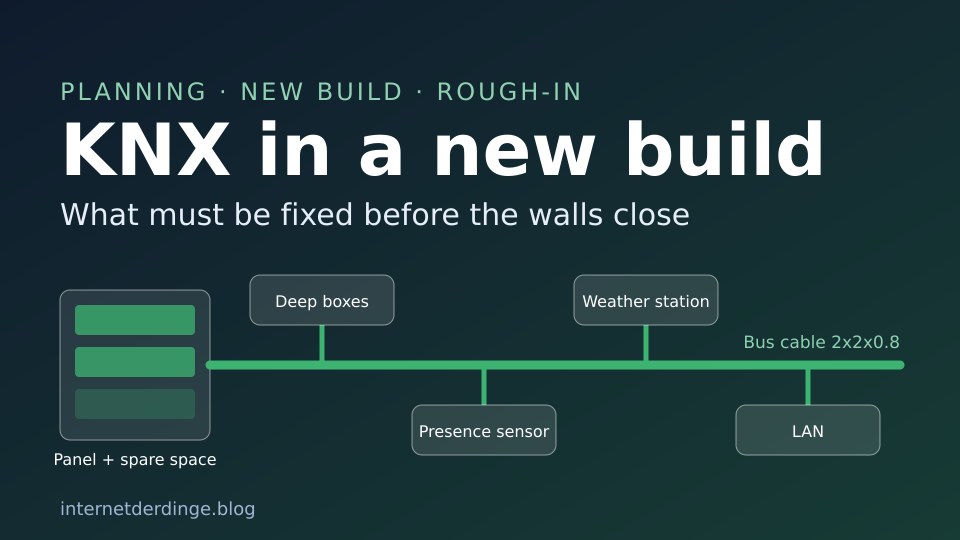
With KNX in a new build, a lot is decided before the first device is programmed. Bus cable, wall boxes and the distribution board go in during the rough-in stage. Anything missing there is hard to add later. Programming, on the other hand, can wait.
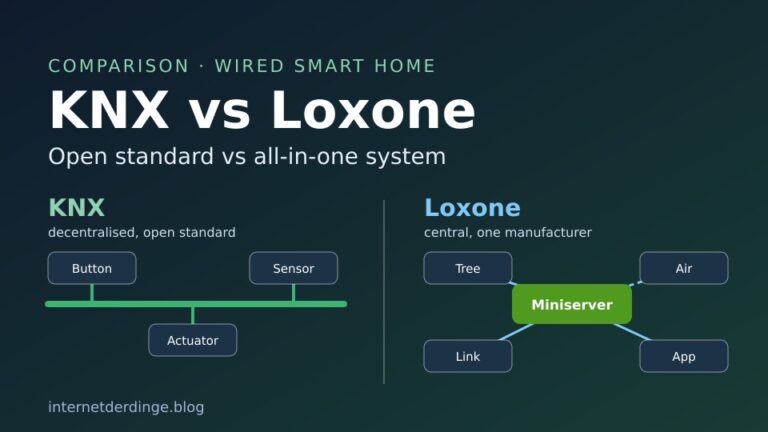
This guide covers what should be settled for a KNX new build before the walls are plastered. It is based on documents from the KNX Association and on data sheets from manufacturers such as Gira, JUNG, MDT, Kaiser and Steinel. How KNX works in general is explained in KNX explained. Whether KNX or an all-in-one system suits you better is covered in KNX vs Loxone.
KNX new build: the rough-in checklist
- Functions first: decide room by room what should be switched, dimmed, shaded and controlled.
- Bus cable: certified KNX cable 2x2x0.8, laid as a line, star or tree. A closed ring is not allowed.
- Separation from mains: in wall boxes, either separate boxes or one box with two chambers.
- Boxes: deep boxes or electronics boxes where push-button interfaces, room controllers or LAN go.
- Distribution board: enough space for the KNX devices, which quickly fill several rows.
- Ceiling: bus cable to every planned presence sensor position.
- Outside: a cable for the weather station, possibly with auxiliary power.
- Network: LAN to the distribution board for an IP interface, visualisation or Home Assistant.
- Handover: a copy of the ETS project file and the documentation, agreed in the contract.
Every KNX line needs its own power supply in the distribution board, for example this one:


Last updated on 2026-11-18 / affiliate links / images from the Amazon Product Advertising API. Prices shown may have changed since then. All information without guarantee. * = affiliate link: if you order a product through such a link, we receive a commission from the seller. There are no extra costs for you.
Plan functions first, then cables
The KNX Association has published a project preparation guide for installers (“KNX Project Preparation”). It contains checklists from the customer’s requirements to the handover. It starts with questions about how each room is used, the lighting plan, shading, the security concept and other systems such as a heat pump or solar panels.
One point from the guide fits a new build particularly well: owners should think in functions, not in switches. They should also consider control points that may only be needed later, for example when children move out, furniture is rearranged or relatives in need of care move in.
You can find a certified installer through the KNX Association’s installer search. KNX is programmed with the ETS, regardless of the manufacturer. Gira points out in its training documents that only one piece of software has to be learned for this.
The bus cable: type, topology and lengths
For Germany, the KNX Association mainly lists YCYM 2x2x0.8 (test voltage 4 kV) and J-Y(St)Y 2x2x0.8 (test voltage 2.5 kV) as bus cables. The cable is shielded and has two twisted pairs. According to Gira, the red and black pair carries signal and power, while the yellow and white pair is a spare, for example for an additional power supply. The KNX Association rules out using ordinary mains cables as bus cables because of the risk of confusion.
You are free in how you lay it: line, star and tree are allowed, and branches can be added anywhere. Rings are not allowed. Gira writes that no rings may be laid even within a line. A guest author on knx.org suggests running the cable through the house as a loop but leaving one end unconnected. That way it can be split if it is damaged.
According to Gira, the bus cable may share conduits and ducts with other circuits. The KNX Association recommends laying it together with the mains cables in the standard installation zones where possible (in Germany defined in DIN 18015-3).
| Limit | Value according to the KNX Association and Gira |
|---|---|
| Power supply to device | max. 350 m |
| Between two devices | max. 700 m |
| Length of a line segment | max. 1,000 m |
| Devices per line segment | usually up to 64, with TP1-256 devices up to 256 per line |
| Recommended load in residential buildings | no more than 90% of the possible devices |
The 10% reserve per line comes from the KNX Association’s guide. It also recommends planning the address ranges with room for future devices.
Separation from mains and shared boxes
According to the KNX Association, KNX is a normal electrical installation, and all the usual regulations apply. Because the bus uses safety extra-low voltage (SELV), the bus cable itself needs no protective measures. The critical spots are where bus and mains meet: distribution boards, control cabinets and boxes.
Between bus voltage and mains, the KNX Association generally requires double insulation rated for a 4 kV test voltage. Where stripped conductors lie next to each other, a clearance of at least 4 mm or additional insulation applies. The shield of the bus cable is never connected or earthed.
For boxes this means: if both the bus cable and the mains cable are stripped inside, you need separate boxes or one box with two separate chambers. Kaiser says the divider in its Electronic box allows bus and mains voltage to be installed in one box in line with the standards.
Wall boxes: plan them deep
Many KNX devices sit in the wall box and need more space there than a normal switch. For its 2076-4 T push-button interface, JUNG gives mounting “e.g. in a deep flush-mounted box (Ø 60 mm x 60 mm)”. Gira recommends a deep device box for its G1 room controller, and an electronics box when it has a LAN connection.
The Kaiser Electronic box 1068-05 is 67 mm deep and has extra room at the side, according to Kaiser for things like small switch actuators. Kaiser also makes Electronic boxes for cavity walls and concrete.
The distribution board: more space than you think
With KNX, switch actuators, blind actuators, heating actuators, the power supply and interfaces usually sit as DIN-rail devices in the distribution board. The KNX Association therefore advises leaving “enough space in the distribution board”. It gives no figure for the reserve, and neither do the manufacturers.
The widths from the data sheets show how quickly the space fills up (1 module = one 17.5 mm unit):
| Device | Width according to the manufacturer |
|---|---|
| Power supply 640 mA (MDT STV-0640.02, Gira 2130 00) | 4 modules |
| Switch actuator, 8-fold (MDT AKS-0816.03) | 6 modules |
| Blind actuator, 8-fold (MDT JAL-0810.02) | 8 modules |
| Heating actuator, 8-fold (MDT AKH-0800.03) | 4 modules |
| Binary input, 8-fold (MDT BE-08000.02) | 4 modules |
| IP interface (Gira 2168 00) | 2 modules |
A power supply, one 8-fold switch, blind and heating actuator each plus an IP interface add up to 24 modules. Circuit breakers, residual current devices and terminals come on top. These figures are an example with MDT and Gira devices, other manufacturers build narrower or wider.
Some devices also need auxiliary power. The Gira IP interface, for example, is powered by an external 24 V DC supply or the unchoked output of a Gira power supply, according to Gira.
Mains cables to lights, blinds and sockets
A DIN-rail actuator switches one load per channel. That is why MDT gives its switch actuators a separate L terminal for each channel. For planning, this means every light, blind and socket circuit that an actuator in the distribution board should switch needs its own cable to the distribution board.
In its “KNX Basics” document, the KNX Association also describes an option for anyone who wants to add KNX later: either lay the bus cable now and add devices later, or wire the conventional installation in a star pattern, with every switch running individually to the distribution board. KNX can then be added centrally in the distribution board later on.
For roller shutters and blinds, the motor matters. According to a guest article on knx.org, 230 V motors have one phase per direction and a shared neutral. 24 V DC motors only need two wires per blind, but they need their own actuators and a 24 V power supply. The advice there: include shading in the plan from the start and decide on the motor type before buying.
Presence sensors in the ceiling
KNX presence sensors in the ceiling are connected directly to the bus. MDT tells installers to connect the presence sensor to the KNX bus. For the rough-in, this means every planned sensor position in the ceiling needs a box with bus cable.
The right height is in the sensor’s data sheet. MDT specifies ceiling mounting at 2 to 4 m for its presence sensors, fitted into a switch box. Steinel gives 2 to 12 m for the True Presence KNX, ideally 2.8 m, and its True Presence detection, which also picks up breathing, works up to a mounting height of 4 m. For wall-mounted motion sensors, the KNX Association mentions about 2 to 2.5 m and corners as a good spot.
Heating, windows and weather station
Heating: The actuators of an underfloor heating system can be switched by a KNX heating actuator. The MDT AKH-0800.03 is 8-fold, 4 modules wide and controls electrothermal actuators at 24 or 230 V. According to MDT, it only needs the room temperature from a push button or presence sensor with a temperature sensor, so a separate room thermostat is not needed. A guest author on knx.org points out that heating manifolds and valves are often needed before commissioning, for example while the screed dries. He recommends a separate cable for them.
Window and door contacts: The permitted cable length depends on the device. It is 5 m for the JUNG 2076-4 T push-button interface, 10 m for the MDT BE-02001.02 push-button interface and up to 100 m for the MDT binary input in the distribution board. If you want to wire the contacts centrally, plan a cable to the distribution board. An example from the KNX Association: if a window is open, the room temperature controller switches to frost protection mode.
Weather station: The Gira Weather Station Plus needs 24 V auxiliary power in addition to the bus cable. Gira recommends a free-standing mast and running the cable through a conduit. The MDT Weather Station Home, on the other hand, needs no additional power supply. Since this depends on the weather station, a cable to the roof that can also carry auxiliary power is worth it. According to the KNX Association, the second pair of the bus cable may carry extra-low voltage.
Network to the distribution board
For programming over the network, a visualisation or Home Assistant, an IP interface or IP router goes into the distribution board. According to its documentation, Home Assistant also needs a KNX IP interface or router on the local network. A network cable to the distribution board therefore belongs in the plan. According to the KNX Association, KNX IP cables are subject to the same requirements as normal network cables.
Some room controllers with a display also need LAN. The Gira G1 with PoE, for example, needs a PoE switch and a Cat.5e to Cat.7 cable. The KNX Association also recommends labelling network sockets, considering a separate network for KNX and setting up remote access via VPN.

Last updated on 2026-11-15 / affiliate links / images from the Amazon Product Advertising API. Prices shown may have changed since then. All information without guarantee. * = affiliate link: if you order a product through such a link, we receive a commission from the seller. There are no extra costs for you.
How much does KNX cost in a new build?
Neither the KNX Association nor the manufacturers give a fixed figure for the extra cost. The KNX Association only says: “At first glance, bus systems appear more expensive than conventional installations.” If you want many functions, though, a bus system is easier and cheaper to install than an equivalent conventional installation, according to the KNX Association.
Further pointers from the KNX Association: a wired smart home costs roughly twice as much as a wireless system. For three trades across the whole house, it expects 20 to 40 hours of work, depending on the size of the home.
Device prices can be checked directly. Gira lists its list prices in its data sheets, and the ETS software is sold in three editions (Lite, Home and Professional) in the KNX Association’s online shop. ETS Home covers one project with up to 64 devices.
The EnOcean Alliance has published a model calculation per square metre. It is an association that represents a competing wireless technology. Its 2021 study puts a fully equipped single-family house with KNX at roughly three times the cost per square metre of a conventional installation, without the ETS. The study’s assumptions: a 20% surcharge for wiring and 30% for products. So it does not come from a neutral party.
Handover: project file and documentation
One point that should be in every quote: according to the KNX Association’s guide, the installer should hand over a copy of the ETS project file to the customer. A change of integrator goes exclusively through the owner, according to the KNX Association, and the previous integrator has to hand over the current project version.
According to the guide, the documentation includes the schematic, electrical plans, room book, acceptance and handover reports and a description of the logic functions. The distribution board, bus devices and network sockets should be labelled. The checklist also suggests agreeing on a reprogramming session after about three months.
Conclusion
For KNX in a new build, the rough-in is what counts: a bus cable without a ring, enough deep boxes, cables to the ceiling and the roof, LAN to the distribution board and, above all, space in the distribution board. If you settle this early, you can add functions later without chasing walls. The project file and the documentation belong to the owner at the end.
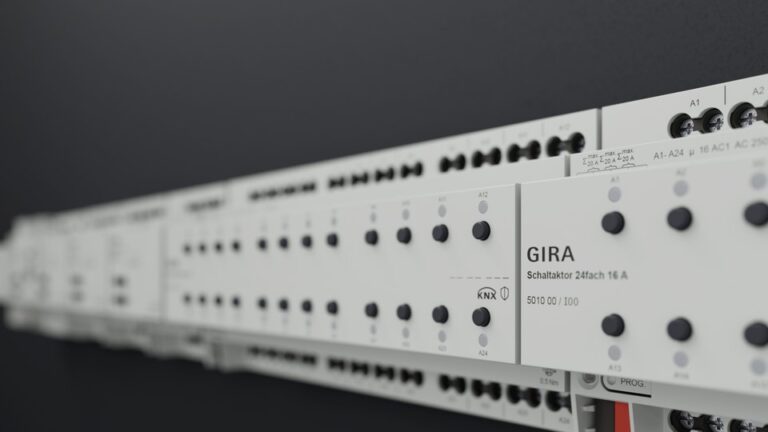
There is more in our KNX & Loxone section, for example on the new Gira switch actuators for the distribution board or the Loxone Miniserver as an alternative.