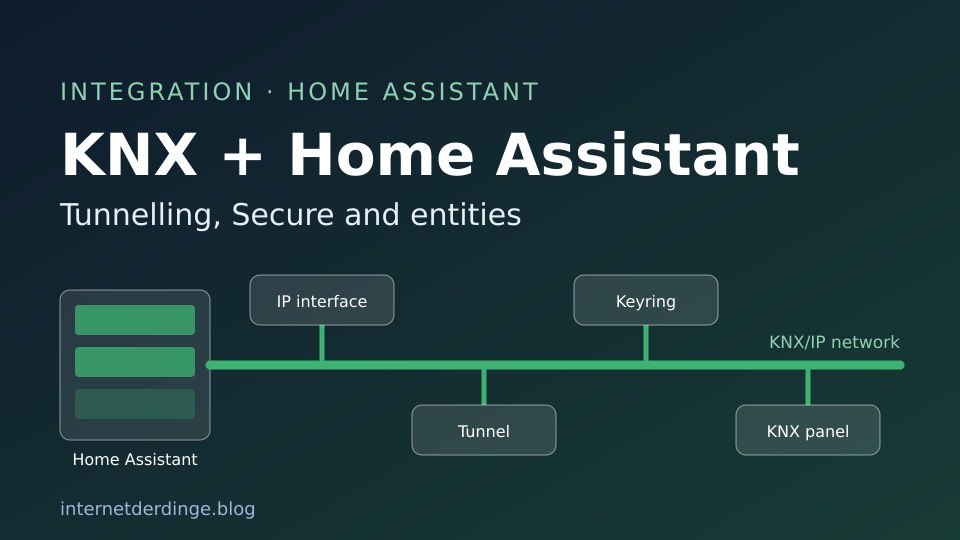
Home Assistant ships with an official KNX integration. It lets you control KNX devices from Home Assistant, react to telegrams from the bus and send states of other devices back to the bus. Setting it up is doable, but a few details matter: the interface, tunnels, addresses and, with KNX Secure, the keyring from ETS.
Here is what you need and how the connection is built. This guide is based on the official Home Assistant documentation (version 2026.11.2, as of 19 November 2026) and on material from the KNX Association and device makers. How KNX works in general is explained in KNX explained.
In short: what the KNX integration can do
According to the Home Assistant documentation, the integration connects Home Assistant to your KNX installation. It can control KNX devices, act on telegrams and forward state changes from other integrations to the KNX bus.
- Official: The KNX integration is part of Home Assistant and has been included since version 0.24.
- Quality: It has the Platinum quality level and the IoT class “Local Push”. Telegrams arrive live over the local network.
- Usage: According to the Home Assistant page, 1.6% of active installations use the integration.
- Technology: It is built on the xknx library. Its project page says it supports routing and tunnelling, IP Secure and Data Secure.
What you need
Home Assistant talks to KNX over the network. According to the documentation you need a local KNX/IP interface or a KNX IP router. Home Assistant recommends a certified device.
USB interfaces are not supported directly. As a workaround the documentation names knxd or Calimero, which bring a USB interface onto the network.
The difference between the two device types: an IP router connects lines over the network, while an IP interface offers tunnelling connections, for example for ETS. The Home Assistant documentation notes that most IP routers support tunnelling as well.
This IP interface is one example available on Amazon. According to Gira’s datasheet it supports UDP/IP with tunnelling, and KNX Secure is not listed there. For Secure tunnelling you need a device with IP Secure, such as the MDT SCN-IP000.03 (according to MDT with KNX IP Secure and KNX Data Secure, sold on Amazon only by third-party sellers):


Last updated on 2026-11-18 / affiliate links / images from the Amazon Product Advertising API. Prices shown may have changed since then. All information without guarantee. * = affiliate link: if you order a product through such a link, we receive a commission from the seller. There are no extra costs for you.
Connection type: Automatic, Tunnelling or Routing
During setup Home Assistant asks for the connection type. There are three options:
- Automatic: Home Assistant runs a gateway scan at start-up, looks for a KNX IP interface and connects through a tunnel. The option is missing if the scan finds nothing.
- Tunnelling: The connection goes to a specific interface. According to the documentation this is the recommended connection type.
- Routing: Home Assistant talks to the KNX IP routers via multicast. The defaults are multicast address 224.0.23.12 and port 3671.
With tunnelling you also pick the type: UDP, TCP or Secure Tunnelling. According to the documentation, older interfaces may only support UDP. If you use tunnelling over TCP or Secure, you can also choose the tunnel endpoint. With “Automatic”, Home Assistant picks a free one. This choice has been available since Home Assistant 2023.1 for Secure tunnels and since 2025.1 for TCP.
You can change everything later: Settings, Devices & services, KNX, three-dot menu, “Reconfigure”. You need this, for example, when the keyring or the connection type changes.
Tunnel limits and individual addresses
Every tunnelling connection needs its own individual address that is unique within the device. Otherwise, according to KNX support, ETS reports “There are no more unique additional addresses available”. This happens, for example, when all tunnels share the same address and a client is already connected.
Two more rules come from the Home Assistant documentation:
- Home Assistant should be the only client on its tunnel endpoint.
- If you want Home Assistant to use a specific individual address, change the address of that tunnel endpoint in ETS.
How many tunnels can run at the same time depends on the device. There is no KNX-wide value. The datasheets of several manufacturers show this:
| Device | Simultaneous tunnels according to the manufacturer |
|---|---|
| MDT SCN-IP000.03 (IP interface) | up to 4 |
| Gira IP router 2167 00 | up to 4 |
| Siemens IP Router N 146/02 | up to 4 |
| Zennio IP Router CL | up to 4 |
| Weinzierl KNX IP Interface 731 | up to 5 |
| ABB IP router Secure IPR/S 3.5.1 | 5 |
| JUNG KNX IP router IPR/IPS 300 SREG | up to 8 |
If you want to run ETS, a visualisation or other tools at the same time as Home Assistant, check the datasheet first. With MDT you enter the first tunnel address in ETS and the device assigns the following three itself. On the ABB router all tunnels are set to 15.15.100 on delivery until the addresses set in ETS are loaded.
KNX Secure: keyring and passwords
According to the documentation, Home Assistant supports both IP Secure and Data Secure. The basics article explains what that means. In Home Assistant the credentials are what counts:
- Keyring file: You export the file with the extension
.knxkeysfrom ETS and import it in the integration settings. During import Home Assistant asks for the password you set when exporting in ETS. - Manual: Only if you do not use Data Secure can you enter the IP Secure credentials by hand. You then enter the tunnel password shown in the tunnel’s properties in ETS.
- Data Secure: The credentials always come from the
.knxkeysfile.
Important before the export: assign all secured group addresses that Home Assistant should use to the interface’s tunnel endpoint or to a dummy device in ETS. If secure groups change later, the participating devices, routers and couplers must be updated. Then you load the new keyring into Home Assistant.
The official changelogs show since when this works: IP Secure in the setup dialog since Home Assistant 2022.4, IP Secure routing since 2022.12, and uploading the keyring file directly in the dialog since 2023.3. Since 2026.1 Home Assistant also reports Data Secure key problems as a repair issue.
Routing: own address and dummy device
With routing, Home Assistant needs its own individual address that no other device uses. The documentation recommends adding a dummy device in ETS at the level of your routers, with exactly this address. You connect all group addresses that Home Assistant uses to this device. That way routers and couplers keep their filter tables up to date, and secure group addresses can be used.
The KNX panel and the ETS project file
Home Assistant has its own KNX panel. You find it under Settings, Connectivity, KNX. It includes a group monitor that shows the telegrams on the bus. The monitor has existed since version 2023.6 and was rebuilt in 2025.8 with better filters and search. By default the telegram history is stored in an internal SQLite database.
In the panel you can also upload the ETS project file. Home Assistant uses it to decode telegrams, which means knowing the data types and names of the group addresses. Without a project file, values that need project data stay empty (null), according to the documentation.
Creating entities: UI or YAML
You make the devices of your KNX system available in Home Assistant as entities. You can do this in the KNX panel or via YAML in configuration.yaml. After a YAML change a restart is required. According to the documentation the available platforms are: binary sensor, button, climate, cover, date, date/time, fan, light, notify, number, scene, select, sensor, switch, text, time and weather.
The user interface arrived step by step. According to the official changelogs it went like this:
| Home Assistant | Can be created in the UI |
|---|---|
| 2024.8 | Switch and light |
| 2025.2 | Binary sensor |
| 2025.6 | Cover |
| 2025.11 | Climate |
| 2026.1 | Time, date, date/time, fan, sensor, scene, text |
| 2026.3 | Number, time server |
| 2026.5 | Entity expose (states from Home Assistant to the bus) |
| 2026.8 | Button, notify |
| 2026.9 | Weather, select |
A few quirks of the platforms according to the documentation:
- Cover: Home Assistant defines 0% as closed and 100% as fully open, unlike most KNX devices. The integration does the inversion. It calculates intermediate positions from the configured travel times, and a position received from the bus takes precedence.
- Climate: The platform is the interface to KNX thermostats and room controllers.
- Scene: It activates KNX scenes and updates when the scene number arrives on the bus. The action
knx.save_scenestores the current actuator states. - Group addresses: The formats 1/2/3, 1/2 and 1 are allowed. Home Assistant reads state addresses at start-up and then whenever no telegram has arrived for an hour. If your device has active state objects, Home Assistant recommends using them instead of passive addresses.
Automations: trigger and actions
For automations there is the trigger knx.telegram. It reacts to incoming and outgoing telegrams, optionally filtered by destination address and data type. The integration also offers actions:
knx.sendwrites data directly to group addresses, raw or encoded with a data type, without needing an entity. The documentation’s example sends the value 50 as a percentage to group address 1/1/1.knx.readsends a read request to a group address. With a response variable the action waits up to 2 seconds for the answer.knx.event_registerregisters or unregisters group addresses for theknx_eventevent. According to the documentation it is mainly meant for blueprint authors; for automations the trigger applies.knx.exposure_registerandknx.save_scenecomplete the list.
States back to the bus: expose and time
Home Assistant can also work the other way round. With an expose it sends the current value of an entity to the bus automatically whenever it changes and answers read requests. It can also send the local time, the date or both to the KNX bus every hour. Since 2025.4 this uses the time zone configured in Home Assistant.
When something does not work
- A value cannot be read: According to the documentation, a communication object of the group address needs the read flag in ETS. The group addresses Home Assistant uses must also be assigned to the interface in use so that answers can pass line couplers and routers.
- Timeout in the log: “KNX bus did not respond in time (2.0 secs) to GroupValueRead request” means a read request got no answer.
- Non-standard devices: If a device uses a non-standard data type or uses telegrams in its own way, it may not be possible to set it up directly as an entity, according to the documentation.
Frequently asked questions
Does a USB interface work? Not directly. According to the documentation the integration does not support it. Home Assistant names knxd or Calimero as a workaround.
Tunnelling or routing? Home Assistant recommends tunnelling.
Do I need ETS? For KNX Secure, yes, because the .knxkeys file comes from ETS. You also set the tunnels’ individual addresses there. Entities themselves can be created in the KNX panel or via YAML.
Does Home Assistant support KNX Secure? Yes, both IP Secure and Data Secure. With Data Secure the credentials always come from the .knxkeys file from ETS.
Conclusion
KNX and Home Assistant work well together once the basics are right: a suitable IP interface or router, a tunnel of its own with a unique address and, with Secure, the keyring from ETS. After that you create entities in the KNX panel and build automations with the trigger and actions.
For planning, a network cable to the distribution board is part of it. That is also in our checklist KNX in a new build. How KNX differs from an all-in-one system is covered in KNX vs Loxone. More articles are in the KNX & Loxone section. The official guide is the Home Assistant KNX documentation.